Body Kind Yoga

The Art of Sitting

What is the most important part of yoga?

Many people would say the breath, or stillness, or alignment or even consistency.

Well, the answer is everything. And nothing. 😅

We can talk more on that another time, as I want to add something that is not really put into the important category.

The way we sit.

”But Natalie!’ I hear you cry, ‘Sitting is easy, we all know how to sit!’

I agree, of course we do, but do we know how to sit in a way that benefits us?


Picture this. You’ve just arrived at a yoga class, and your teacher tells you something along the lines of ‘find a comfortable seat”. You’ll probably copy the way the teacher is sat, or other people in the room, and that is that, you don’t think about it any further. But a comfortable seat might not be the best for our body.

All of us spend a lot of our time sitting, depending on our job and lifestyle of course. Us human-beings have created objects for us to sit on so we are more ‘comfortable’. Chairs, sofas, even beanbags have created issues with our postures, bending our spines into positions that can eventually attribute towards back, shoulder or neck pain.

So, when we practice yoga & meditation, we often find ourselves in a seated position and as your practice develops you may find yourself sitting for longer periods of time. In this post, I will show you some sitting variations – starting from a classic seated pose and then progressing through more accessible variations.

To Cushion or Not To Cushion

Before we even start to look at the various ways to sit in Yoga, it is important to consider your spine. The spine is key in holding up the rest of your body, and is also the highway where the energy travels up from the base of the spine (the Root Chakra), to the top of the head (the Crown Chakra). A bent spine can cause energy blockages, resulting in pain along the spine and eventually around the body.

When you are seated, a natural, tall, straight spine should not be difficult to hold, and we can aid ourselves in achieving a comfortable, tall, straight spine with one simple thing. SUPPORT!

Props are your best friend during your practice, and I encourage you to use them as much as possible. In terms of sitting, you’ll need to use something to lift your hips off the floor, automatically making it easier for us to sit with a tall spine. Bolsters, Zafus, Blocks and Cushions are all options you can use to be more comfortable. Also bear in mind you can use furniture, chairs, table legs, backs of sofas and walls to help too!

Bonuses of lifting the hips off the floor include:

  • A naturally straight spine.
  • Less pressure on the nerves and blood flow in your legs and feet.
  • A feeling of being taller and more confident
  • A deeper connection to being grounded.

Once you’ve picked the prop that brings you the most happiness, it is also important where you sit on your prop. I recommend you sit towards the front of your prop to guarantee the lifting of the hips. You should notice when your hips are lifted and when they are not, and it should be harder to straighten your spine if your hips are still on a flat floor.


Sitting Pretty

Let’s take a look at different ways to sit. Remember, it’s important to find a posture that’s comfortable for your body.

Some will be harder for you than others, so choose a posture that:

  • allows you to have a strong and stable base.
  • keeps your spine straight and shoulders relaxed.
  • relaxes your stomach muscles.
  • allows you to sit comfortably for a long duration.
Photo by Andrew Clark for Yoga Journal

Padamasana - Lotus Pose

This is the classic seated posture in yoga. You may have seen ancient paintings and statues of deities such as Buddha sat in this pose.

To enter this pose, start in Staff Pose (Dandasana). Bend your right knee out to the side, and cradle your knee and your foot in your hands. Rotate your leg from the hip (not the knee) and guide your foot into your left hip crease, repeat on the other.

For most beginners to yoga, the full expression of Lotus Pose is not recommended, but there are variations that make it easier.

By working on the hips, you can train yourself to come into this pose.

Ardha Padamasana - Half Lotus Pose

An accessible variation of Lotus pose. Here you are only placing one foot near the top of your thigh, and the other foot is on the floor, supporting the opposite thigh.

It can be challenging when first practicing this posture, however by spending more time in this posture, through meditation for example, it becomes very comfortable.

Photo by Andrew Clark for Yoga Journal

Sukhasana - Easy Pose

You may recognise this posture from childhood, being made to site cross-legged on the floor and is accessible for most people.

Thanks to sitting in chairs,  adults more often have tighter hips and this pose is a great way to help open them.

If your knees are resting quite high up in Easy Pose, you can use blocks and cushions to support them, particularly if you’re in this pose for a longer duration.

Vijrasana - Hero Pose

Hero Pose is definitely a more challenging pose, particularly if held for a while.

For a first layer of this pose, support is necessary. Use a bolster in-between your legs, blocks under your sit-bones, a meditation stool (pictured) or a blanket/cushion between your bottom and your feet.

Once this becomes more comfortable on your knees and tops of the feet, you can begin to take away the support, and challenge yourself to bring your sit-bones towards the floor in the full expression of Hero Pose.

This is not recommended for anyone with knee or ankle injuries.

Photo by Rick Cummings for Yoga Journal
via Google
via Google
Photo by Andrew Clark for Yoga Journal

Baddha Konasana - Butterfly Pose

A comfortable pose for those with bigger bellies, Butterfly pose is a great hip-opener. This pose helps to stretch your inner thighs and build strength in your back.

Come into the pose by clasping the ankles and bringing the feet together and up towards the groin, opening the legs, sending the knees to the ground. Allow them to fall where comfortable, and use support under the knees if they stick up, or you can move the feet away from you for an easier time. Maintain a tall spine throughout.

Butterfly Pose is great for an entry level seat of meditation. Take advantage of using props here, as this pose reminds you that sitting for a while should not be a chore, but an ease!

Agnitstambhasana - Fire Log Pose

An advanced pose, Fire Log Pose stretches the outer hips intensely, and particularly helps with pain from sciatica.

Practiced by stacking your left leg over your right to resemble logs on a fire. The ankles should be aligned with the knees.

You can stay in this expression, and softly lean on the top leg to stretch, or you can slide your left shin forward directly below the right to increase the challenge. A forward fold can be practiced here too.

It is recommended to enter the pose by prepping with Butterfly Pose and other hip-openers such as Baby Cradle Pose (Hindolasana) (pictured).

Photo by Chris Fanning for Yoga Journal
From Yoga International
Photo by Jivana Heyman for Yoga Journal

Seated Chair Variation

Last but not least, there is the option to sit on a raised chair. It is just as effective as the above poses, especially if this kind of seated position is where you experience true comfort and stability.

Try to prop your hips up using a blanket on the chair. If you have issues with your ankles, you can also place blankets under the feet, as pictured here.

Keep your spine tall, relax your shoulders and commence your practice.

The Best Seat in the House

If you choose a seated option that is best for you, you are creating a positive and nurturing environment for your practice.

Your breathing and meditation practices will begin to improve, allowing you to go deeper into stillness and self-exploration, to discover things you never knew about yourself.

When you introduce movement through postures, your seated posture will affect your spine, hips, legs, knees and other muscles for the the better – which in time may improve your sitting further, and allow accessibility into poses that you assumed were unattainable.

I challenge you, for the next month, to find your seat and to put yourself in that posture for at least 5 minutes every day. Close your eyes, and come to stillness, perhaps with some music on, perhaps not, and listen to your body.

Observe how you feel.

What can you do to feel so comfortable that sitting properly (and beneficially) comes naturally?

Before you know it, you won’t even think about it!


Happy sitting!

signature

Recent Post

The Art of Sitting

The Art of Sitting

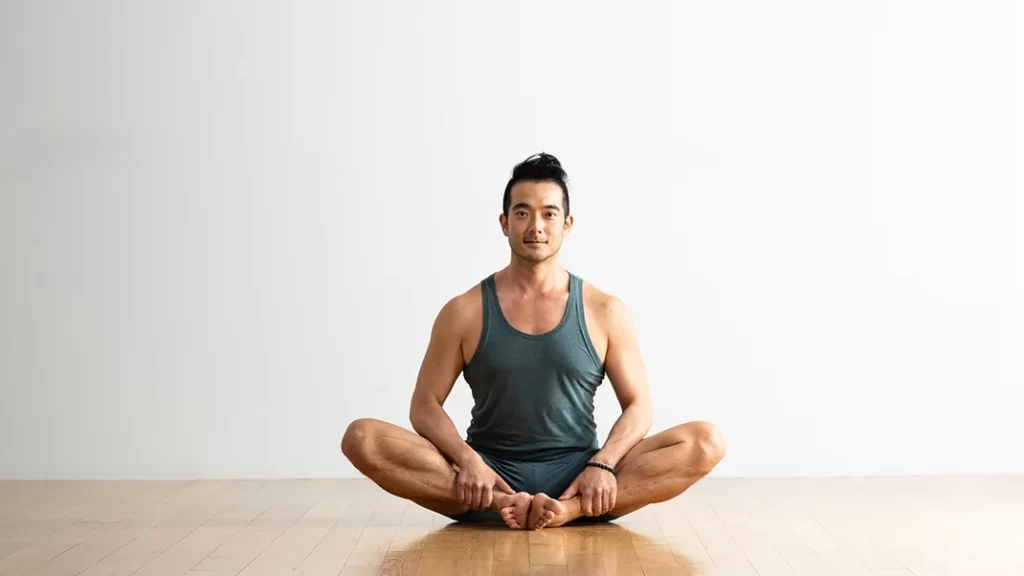
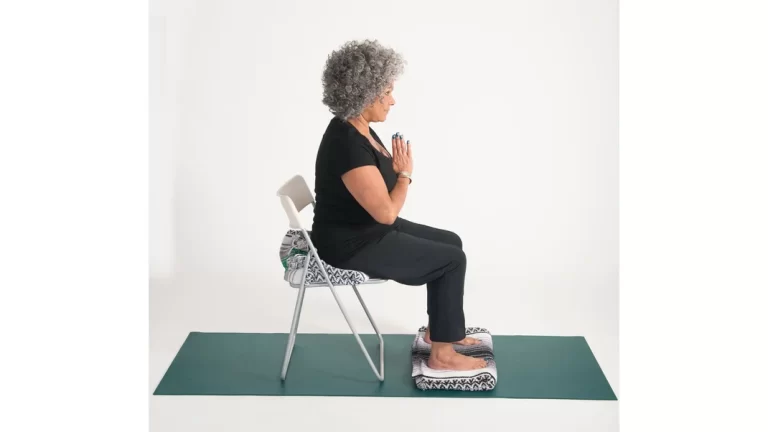
April 7, 2022 The Art of Sitting What is the most important part of yoga? Many people would say the breath,…

We All Begin Somewhere

We All Begin Somewhere

February 28, 2022 We All Begin Somewhere So here goes my first musing. I’d like to dedicate it to the first…